
Plastering for your Ceilings
Damaged, old, looking to decorate or for new builds, we can plaster your ceiling. We apply a range of techniques to find solutions for any ceiling type. Leaving your ceilings, smooth, insulated, and ready for paint. Sharp clean lines or smooth sweeping curves we can get the look you are after in your home or workplace. We have experience with all styles from Victorian styles to modern minimalist designs.
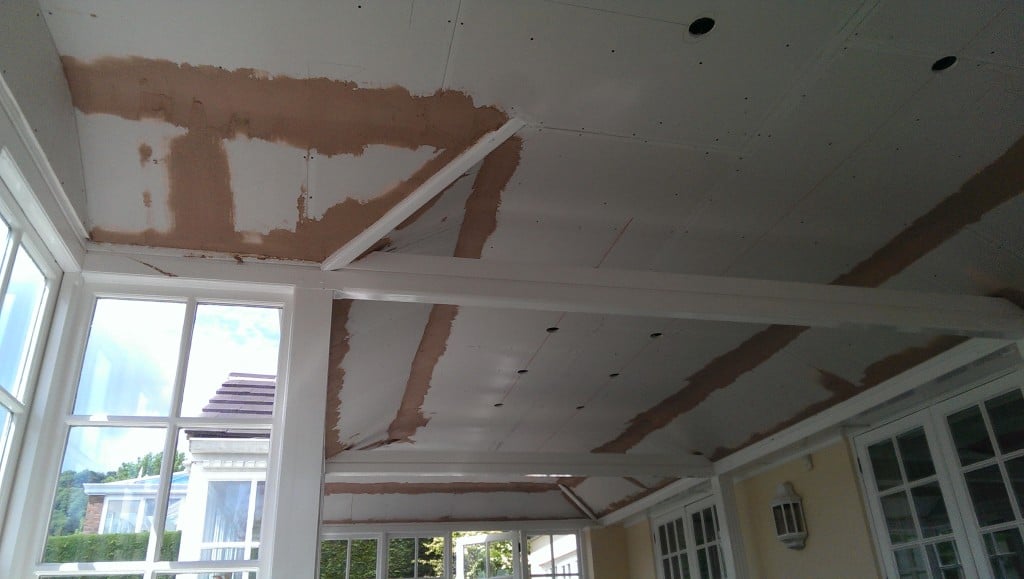
Go from this
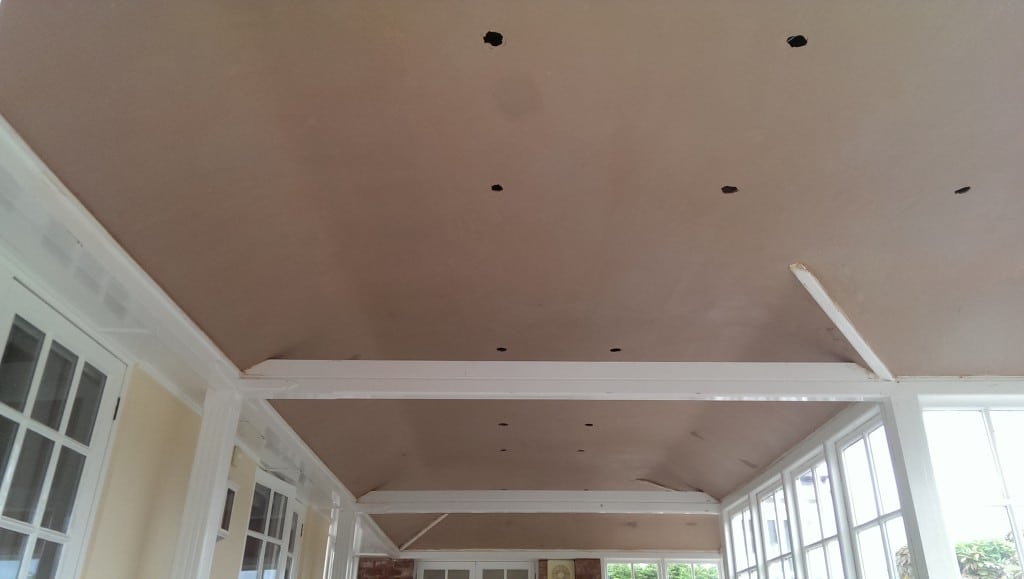
To this
Ceiling Repairs & Replacement
There are two varieties of ceilings; traditional lath-and-plaster in older houses and also plasterboard, which since the mid-1960s, has been used widely in new homes. For plaster-board ceilings, sheets of plasterboard are nailed to the ceiling joists, then scrim (a self-adhesive tape) is taped across all of the joints before plaster is applied.
We are experts in both and can plaster or repair both.
Often small damaged areas can be repaired and patched into existing plaster to avoid re-plastering whole walls or ceilings.
A visit to your home is required to determine whether or not this can be done.
With the replacement of old or damaged ceilings, removing old ceilings can be a messy job, however, with our site visit and guide to preparing your home the process does run smoothly. Old ceilings are taken down and bagged ready for your disposal. Joists are de-nailed and new Gyproc plasterboard is screwed into place ready for plastering. Alternatively, we will over-board an existing ceiling where possible.
Over-Boarding
A great solution if your ceiling is not too badly damaged but has many imperfections. I.e. an old lathe and plaster ceiling or a ceiling with an unstable background such as flaking paint, powdery surfaces or a ceiling that has many glue deposits from the removal of Polystyrene Tiles or ceiling paper. We apply a new layer of plaster-board over the old ceiling then skim for the perfect finish.
Skim Over Artex
To skim over Artex, we will first paint a watered down solution of PVA onto the Artex before skimming, this helps the bonding process and also helps to reduce the suction of the dry Artex. We will knock off all Artex high spots before we start skimming and add a second coat of PVA before applying the first coat of plaster. This involves lightly scraping back any high spots of the textured pattern, then sealing the entire surface with a sealant agent. Once dry, two coats of finishing plaster are applied and worked to a smooth finish (please note that the plaster must be completely dry before decoration). The result is a smooth, perfect finish, ready for paint.